Quickly compress images with Automator (Mac)
• public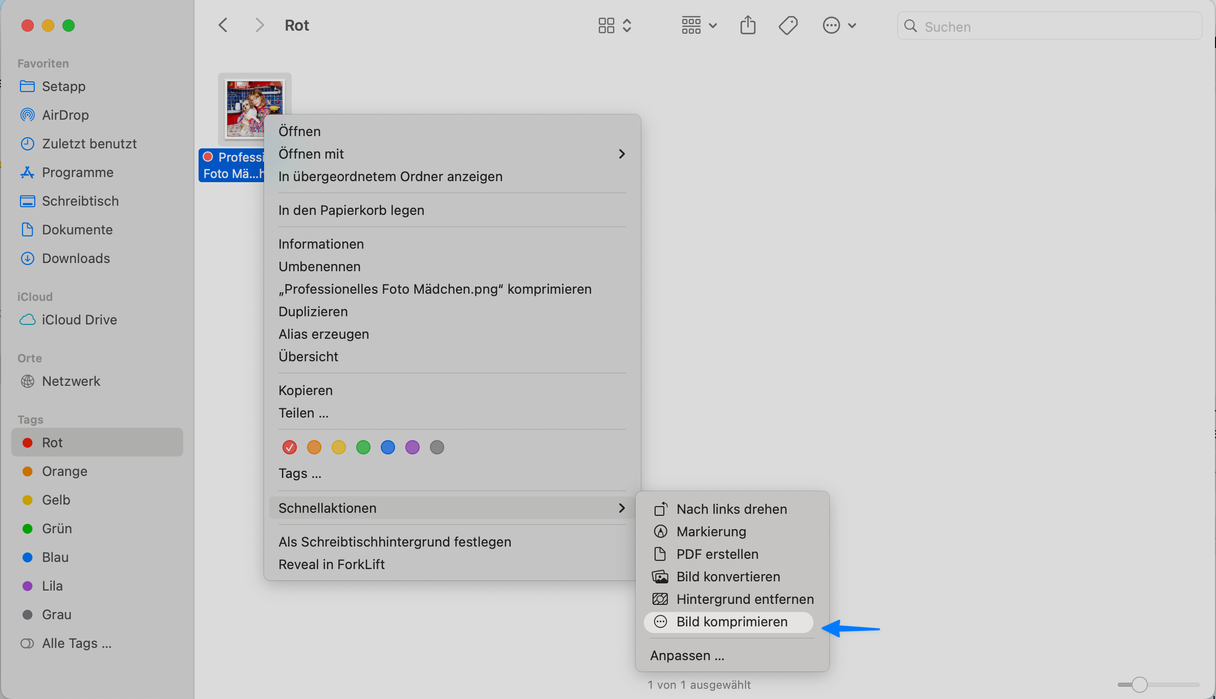
Although data-plans are becoming bigger and bigger the size of a webpage still matters – according to many sources the page load time drastically affects all your important KPIs (most importantly your conversion rate).
One of the big reasons for larger websites are images. As our phones get better resolutions the images need to keep up and their size increases quite a bit.
But there is one really easy thing that you can do – and most people forget. You can compress images with minimal effects on the quality
There is a great service called TinyPNG that does exactly that: “PNG and JPEG compression with a perfect balance in quality and file size”
The technical marketers solution: Automate the process!
If you’re dealing with images on a regular bases you don’t want to have to open a web service every time you want to compress an image. How can this be done? I made a short video for you to follow along, the steps are explained below:
Instructions:
- Fire up Automator (CMD + SPACE, “automator”, ENTER)
- File > New, Select “Service”.
- In the search field search for “run shell script”, drag the item to the right area.
- Setup like this:
- “Service receives selected” = “image files”
- “in” = “finder”
- “Shell” = “/bin/bash/”
- “Pass input” = “as arguments”
- Paste the following code into the text field below (delete the example code before)
#!/bin/bash
set -e  # Exit on error

# Define API key as a variable
API_KEY="INSERT_YOUR_API_KEY_HERE"

for file in "$@"; do
    # Extract directory, base name, and extension
    dir=$(dirname "$file")
    filename=$(basename "$file")
    name_without_ext="${filename%.*}"
    ext="${filename##*.}"
    ext=$(echo "$ext" | tr "[:upper:]" "[:lower:]")
    compressed_file="${dir}/${name_without_ext}_compressed.${ext}"

    if [ -f "$file" ]; then
        case "$ext" in
            png|jpg|jpeg)
                # Compress the file
                JSON=$(curl --user api:${API_KEY} --data-binary @"$file" https://api.tinify.com/shrink -s)
                if [ $? -ne 0 ]; then
                    echo "Error: Failed to connect to TinyPNG API for $file"
                    continue
                fi

                URL=$(echo "$JSON" | jq -r '.output.url' 2>/dev/null)
                if [ $? -ne 0 ] || [ -z "$URL" ]; then
                    echo "Error: Failed to extract URL from API response for $file"
                    continue
                fi

                curl "$URL" > "$compressed_file" && echo "Created: $compressed_file"
                ;;
            *)
                echo "Skipping $file: unsupported extension"
                ;;
        esac
    else
        echo "$file does not exist"
    fi
done

# Play sound if available, suppress errors
[ -f /System/Library/Sounds/Submarine.aiff ] && afplay /System/Library/Sounds/Submarine.aiff 2>/dev/null

echo "Script completed"- Request a API Key from TinyPNG
- Click the Link in the Email TinyPNG sends you.
- Copy the API Key and replace it in the code fragment where it states
APIKEY. - File > Save!
- Name the service how you want it to show up in the context menu. (Example: Compress Images).
- Done! Right click on an image file in the finder an hit “Compress Images” to let the magic happen!
Disadvantage: You're limited to 500 files per month, although I've found this to be quite a lot.